AWS - VPC
Let's learn about Virtual Private Cloud!
Translated by Claude Opus 4.5
AI-generated content may be inaccurate or misleading.
Theory
VPC (Virtual Private Cloud)
VPC stands for Virtual Private Cloud, which provides a logically isolated space on AWS to help you run resources.
Types of VPC
In AWS, there are Default VPCs and Custom VPCs for each Region. Default VPCs are created by default, one per Region, and Custom VPCs can be created up to 5 per Region.
Subnet
A network divided into smaller network areas. In the cloud environment's VPC, you can also divide and separate networks through subnets.
Reserved IP Addresses in Subnets
If the IP range assigned to a subnet is 10.0.0.0/24, then from 10.0.0.0 ~ 10.0.0.255:
| Address | Description |
|---|---|
| 10.0.0.0 | Network address |
| 10.0.0.1 | AWS VPC virtual router address |
| 10.0.0.2 | AWS DNS server address |
| 10.0.0.3 | Reserved for future new features |
| 10.0.0.255 | Network broadcast address |
Also, AWS Subnets have Public Subnets and Private Subnets. Public Subnets are networks that can communicate directly with the external internet, Private Subnets are closed networks that cannot communicate directly with the external internet. *However, Private Subnets can communicate with the outside if there is a NAT Gateway.
Security Group and ACL
The security technology at the instance level is Security Group. There is also a security technology used at the subnet level called Access Control List (ACL).
Lab - Public Subnet VPC Configuration
Lab Steps
| Public Subnet VPC Creation | Verification |
|---|---|
| Create VPC | Create EC2 instance |
| Create public subnet | Access EC2 instance and verify communication |
| Create internet gateway and attach to VPC | |
| Create public routing table and associate subnet | |
| Add route to public routing table |
Create VPC
- Access VPC Console -> VPC

- Name: CloudPeter-VPC
IPv4 CIDR block: 10.0.0.0/16
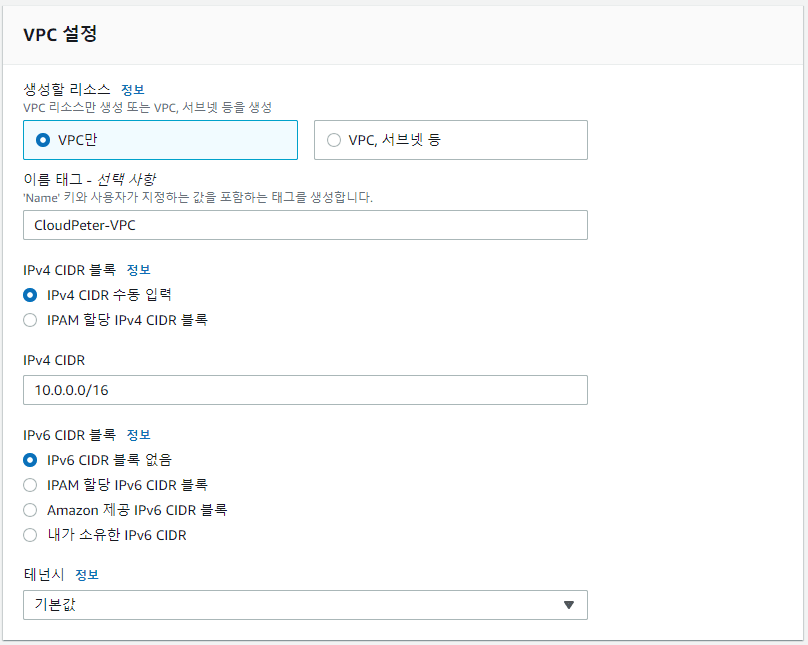
- Verify creation
 *Later, you can distinguish between default VPC and custom VPC by checking the presence of the Name Tag
Create Public Subnet
- Access VPC Console -> Subnets

- VPC ID: Select created VPC (CloudPeter-VPC)
Name tag: CloudPeter-Public-SN
Availability Zone: ap-northeast-2a
IPv4 CIDR block: 10.0.0.0/24
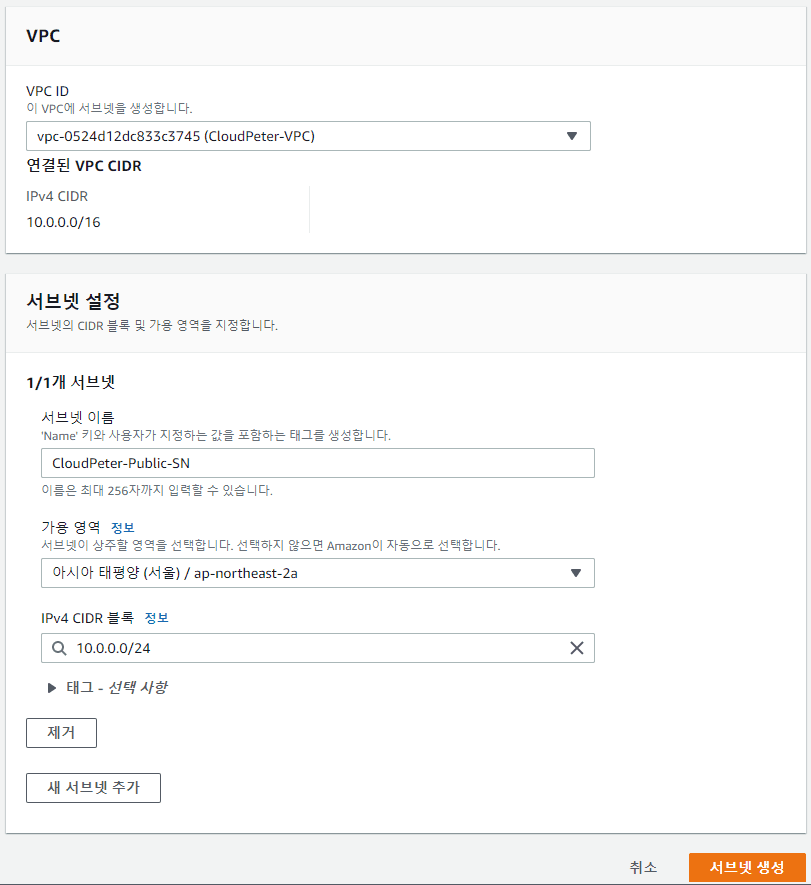
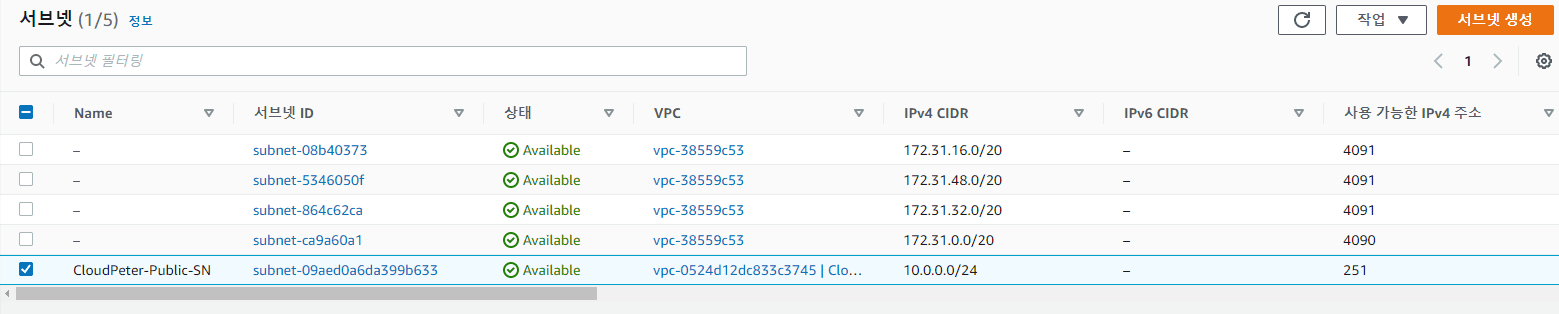
- Verify creation
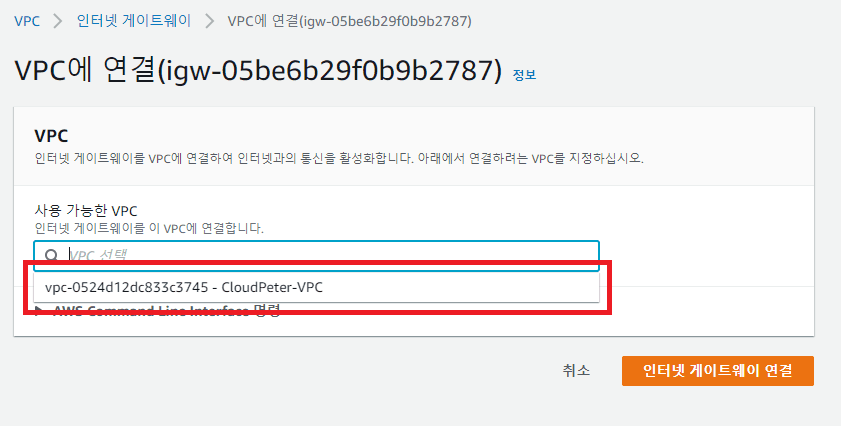
Create Internet Gateway and Attach to VPC
Create an IGW and attach it to the VPC for communication with the external internet
- Access VPC Console -> Internet Gateways

- Name tag: CloudPeter-IGW
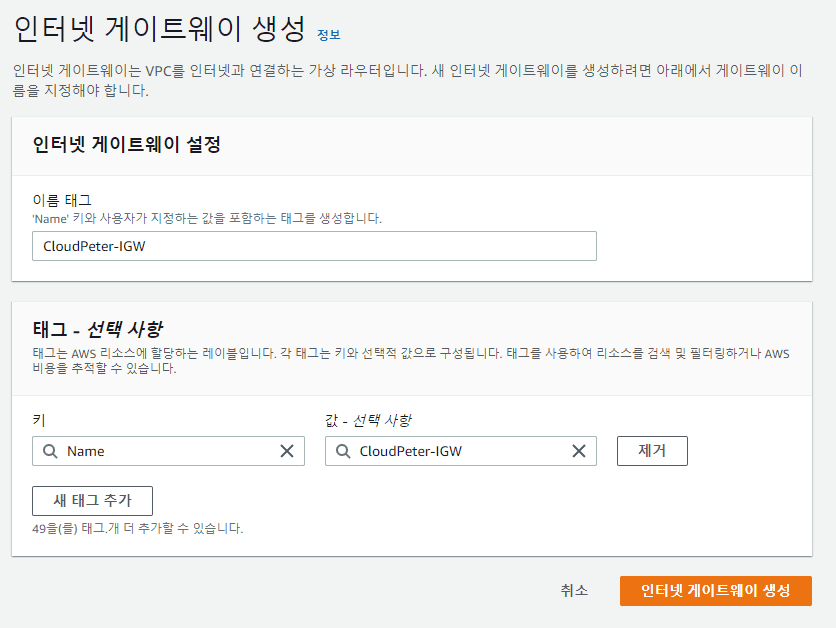
- Attach IGW to VPC
 Available VPCs: Select created VPC (CloudPeter-VPC)
- Verify attachment
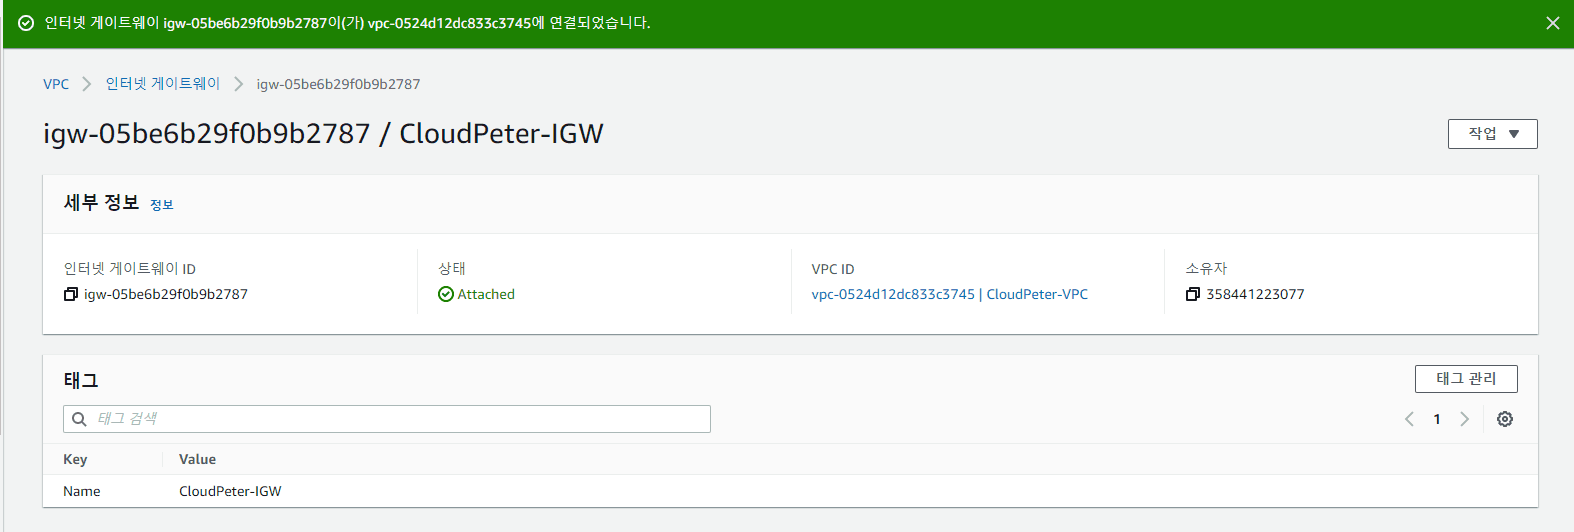
If you've proceeded this far, the IGW for communicating with the internet is attached to the VPC, and the subnet is also created. However, external internet access is still not possible because there is no routing path to the external internet in the VPC's virtual routing table.
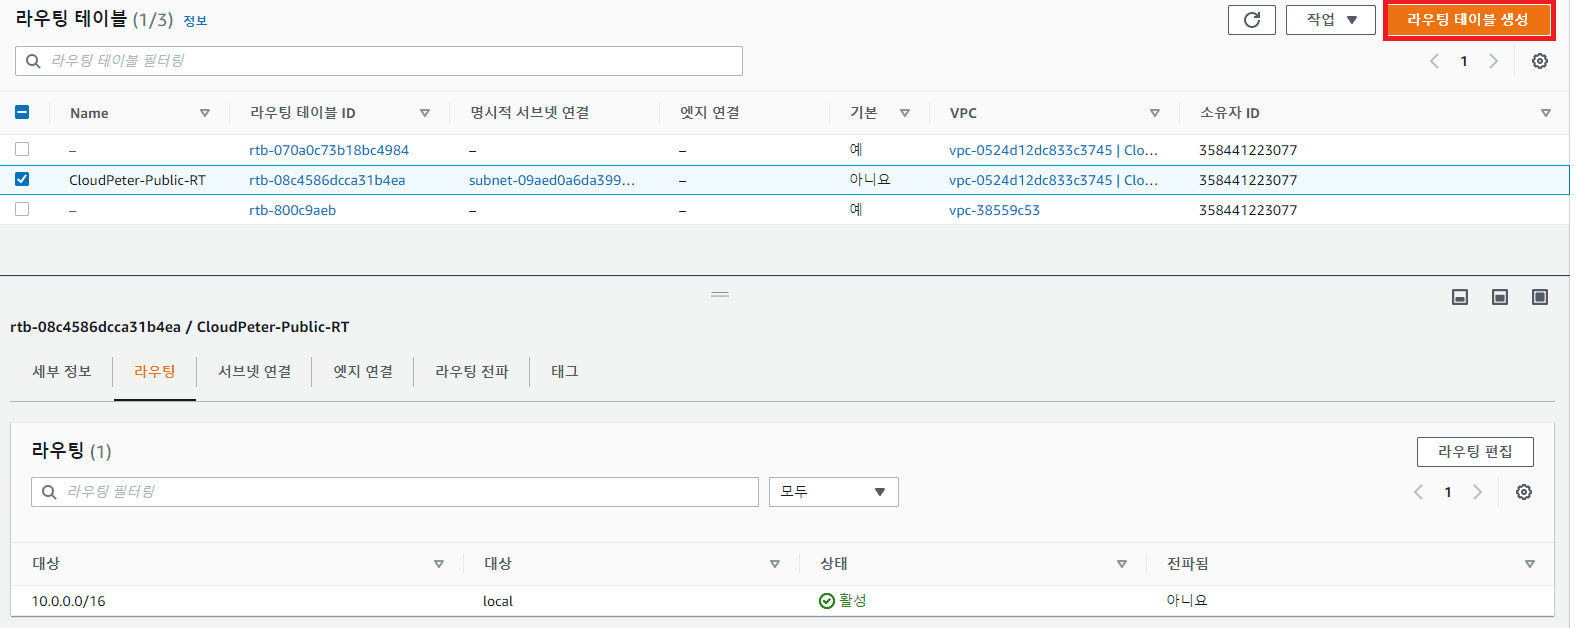
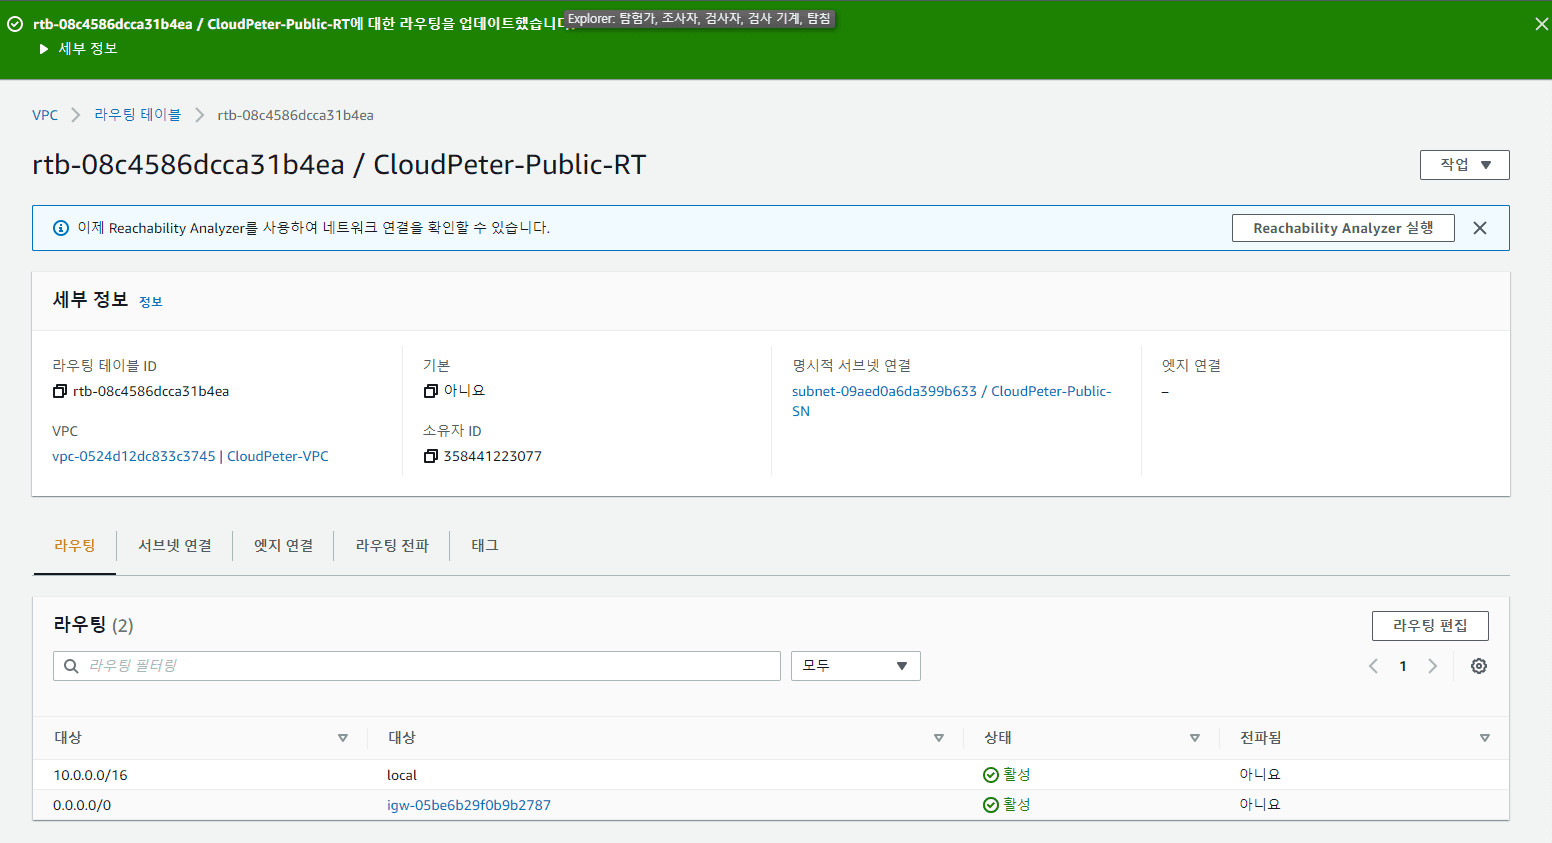
Create Public Routing Table and Associate Subnet
- Access VPC Console -> Route Tables

- Name tag: CloudPeter-Public-RT
VPC: Select created VPC (CloudPeter-VPC)
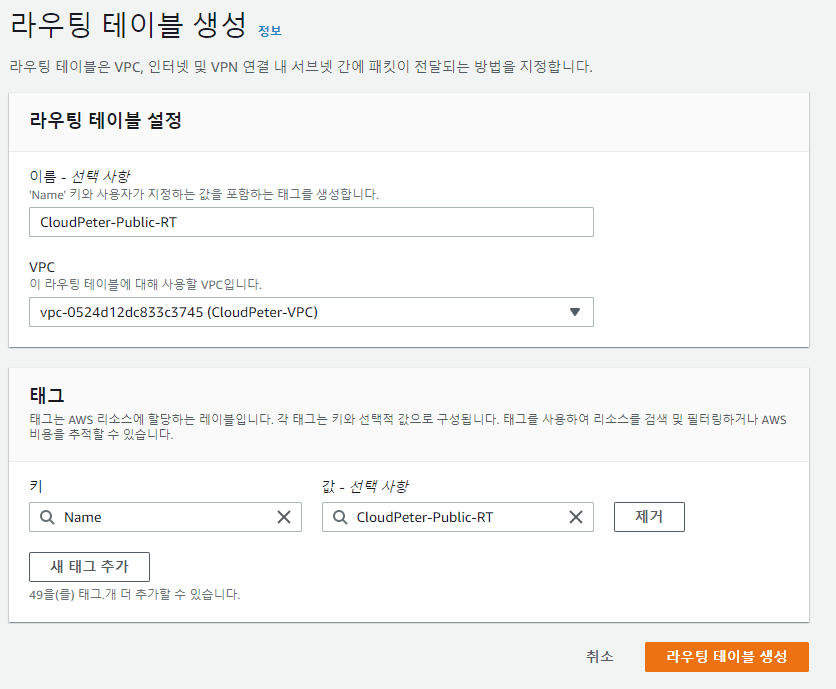
- Verify creation and associate subnet
 Click Subnet associations
 Click Edit subnet associations
 Select the previously created subnet
Add Route to Public Routing Table
- VPC Console -> Route Tables
- Select CloudPeter-Public-RT
- Go to Routes tab
- Destination: 0.0.0.0/0
Target: Internet Gateway -> Select igw-xxxxx

- Verify application
Now all configurations are complete. Let's verify if actual communication is possible.
Create EC2 Instance
Create an EC2 instance to verify communication
-
Access EC2 Console -> Instances
-
Click Launch instances

-
Name: Public-EC2 OS Image: Amazon Machine Image(AMI), 64bit Instance type: T2.micro Key pair: The one you always use
-
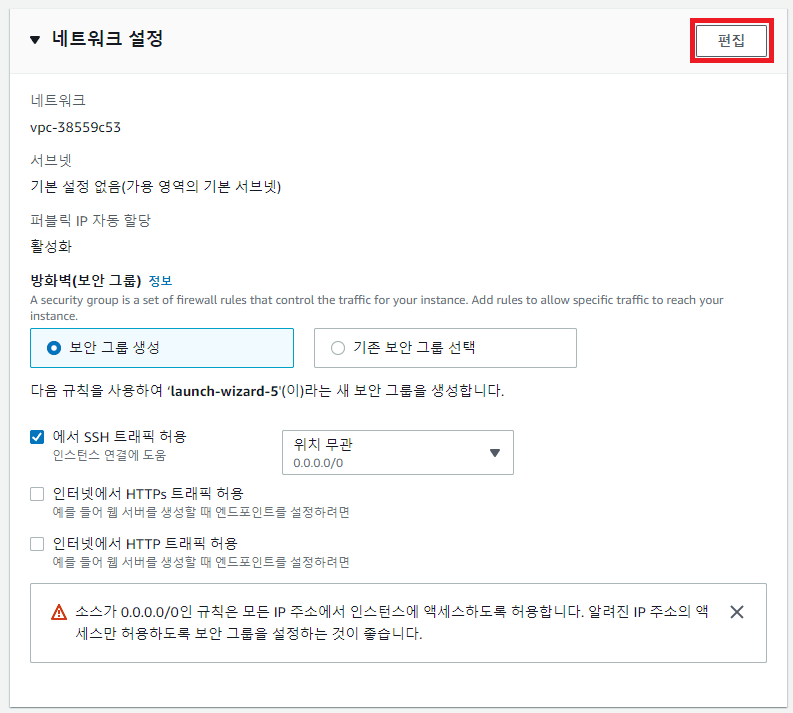
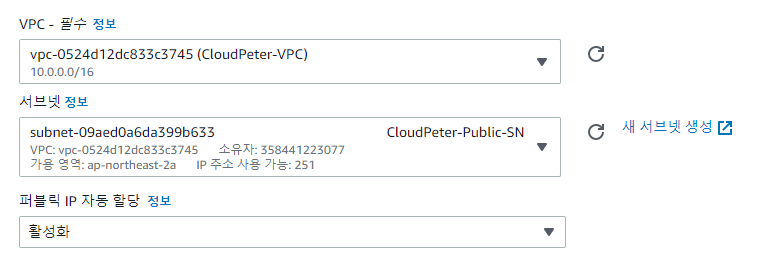
Network settings -> Edit
-
VPC: Select created VPC (CloudPeter-VPC) Subnet: Select created Subnet (CloudPeter-Public-SN) Auto-assign public IP: Enable
-
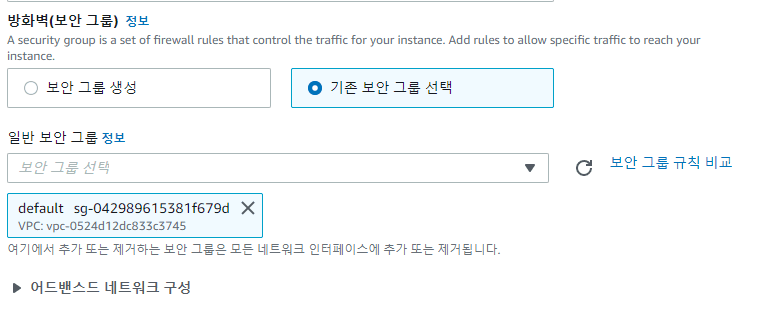
Security group: default
-
Verify creation

Access EC2 Instance and Verify Communication
Access via SSH using the public IP, then run
ping google.com
If the ping works, success!
Lab - Private Subnet VPC Configuration
Lab Steps
| Add Private Subnet | Verification |
|---|---|
| Create private subnet | Create EC2 instance |
| Create NAT gateway | Access EC2 instance and verify communication |
| Create private routing table and associate subnet | Communication flow between public and private subnets |
| Add route to private routing table |
Create Private Subnet
-
Access VPC Console -> Subnets
-
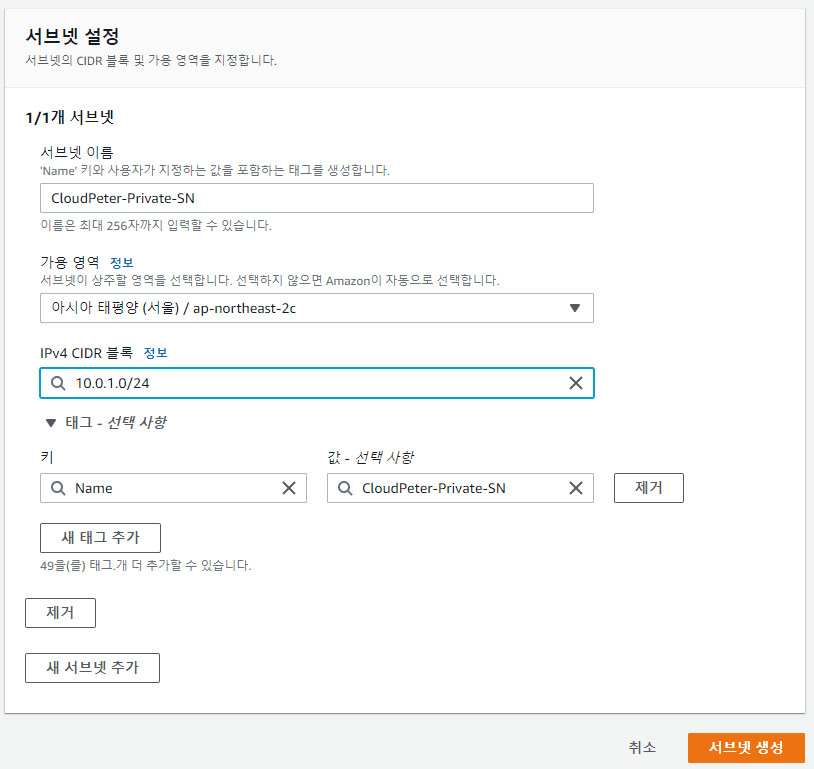
Create subnet VPC ID: Select created VPC (CloudPeter-VPC) Name tag: CloudPeter-Private-SN Availability Zone: ap-northeast-2c IPv4 CIDR block: 10.0.1.0/24
-
Verify creation

Create NAT Gateway
-
Access VPC Console -> NAT Gateways

-
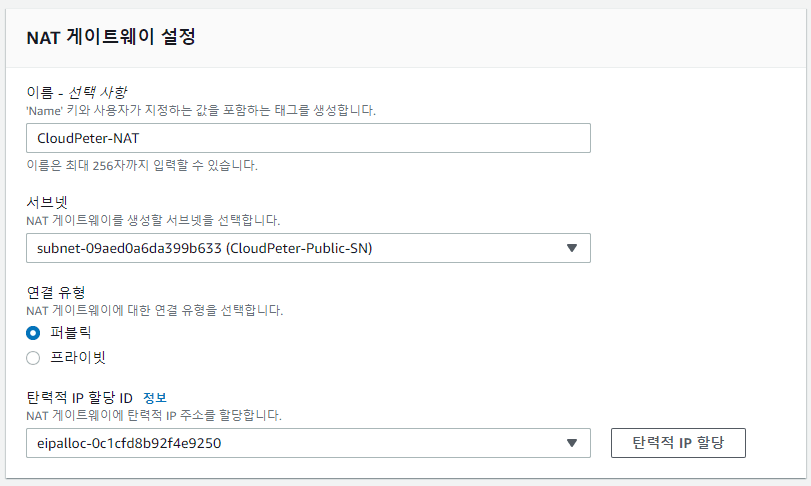
Name: CloudPeter-NAT Subnet: Select public subnet (CloudPeter-Public-SN) Click Allocate Elastic IP!
-
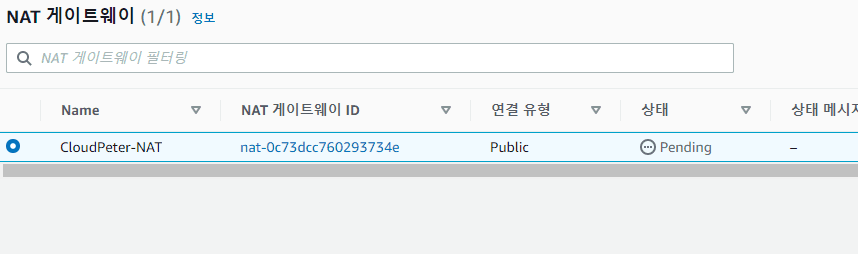
Verify creation
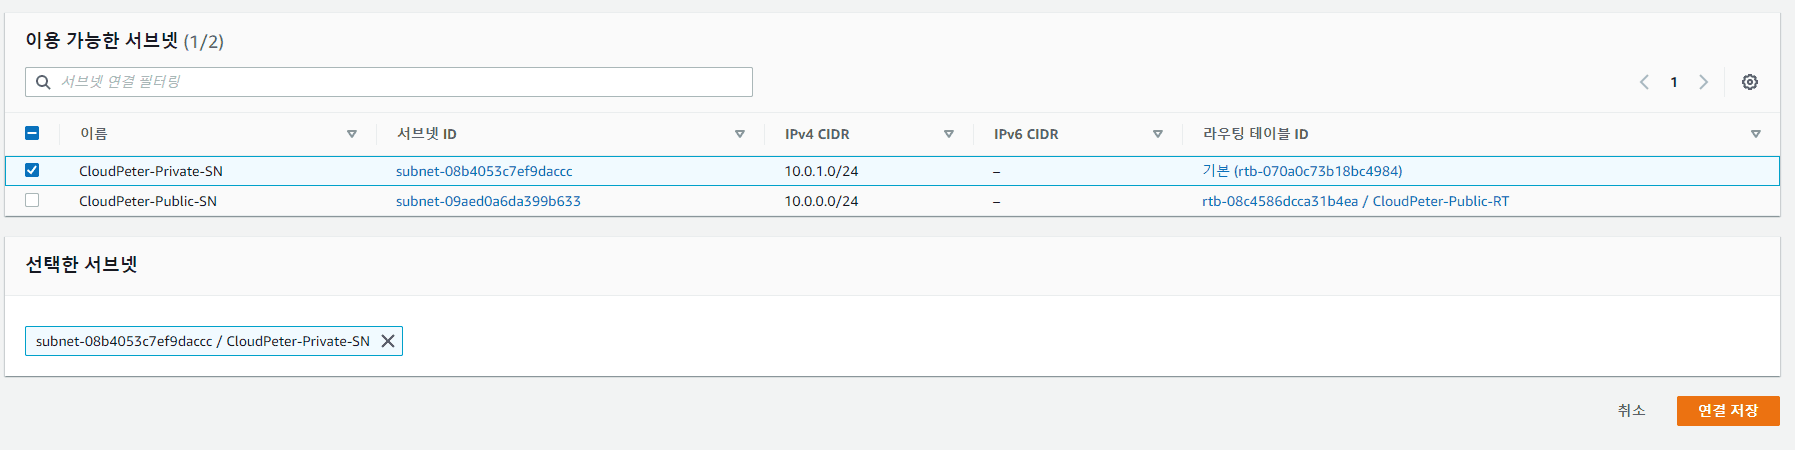
Create Private Routing Table and Associate Subnet
-
Access VPC Console -> Route Tables
-
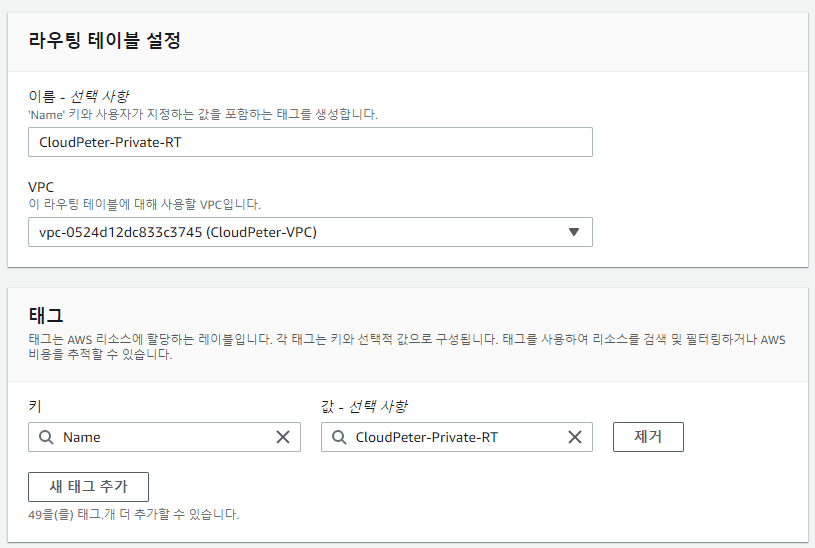
Name tag: CloudPeter-Private-RT VPC: Select created VPC (CloudPeter-VPC)
-
Select private routing table
-
Click Edit routes
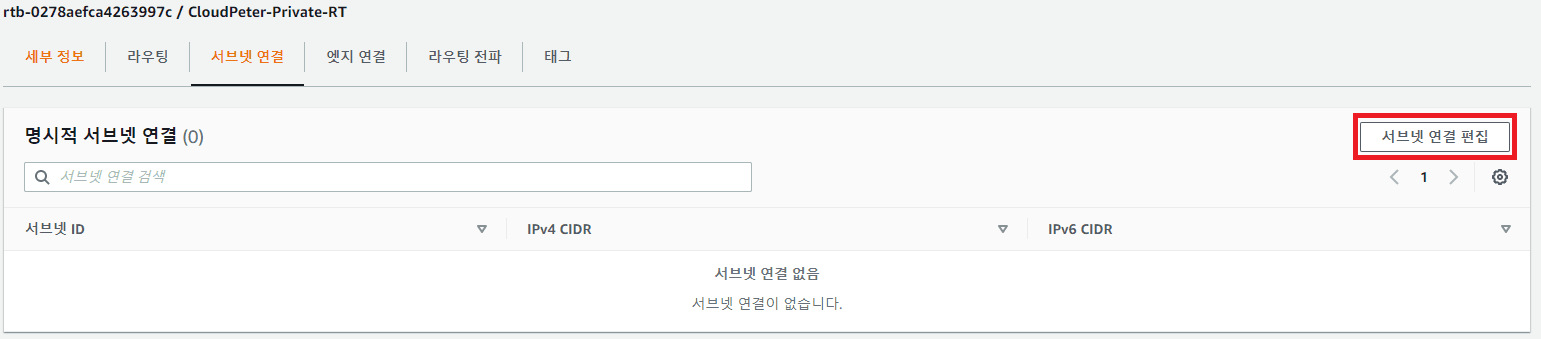
-
Select private subnet (CloudPeter-Private-SN)
Add Route to Private Routing Table
-
Access VPC Console -> Route Tables
-
Select private routing table
-
Click Edit routes
 Edit as follows (Select NAT Gateway)

Create EC2 Instance
-
Access EC2 Console -> Instances
-
Name: Private-EC2 Network: Select created VPC (CloudPeter-VPC) Subnet: Select created private subnet (CloudPeter-Private-SN)
-
Network settings
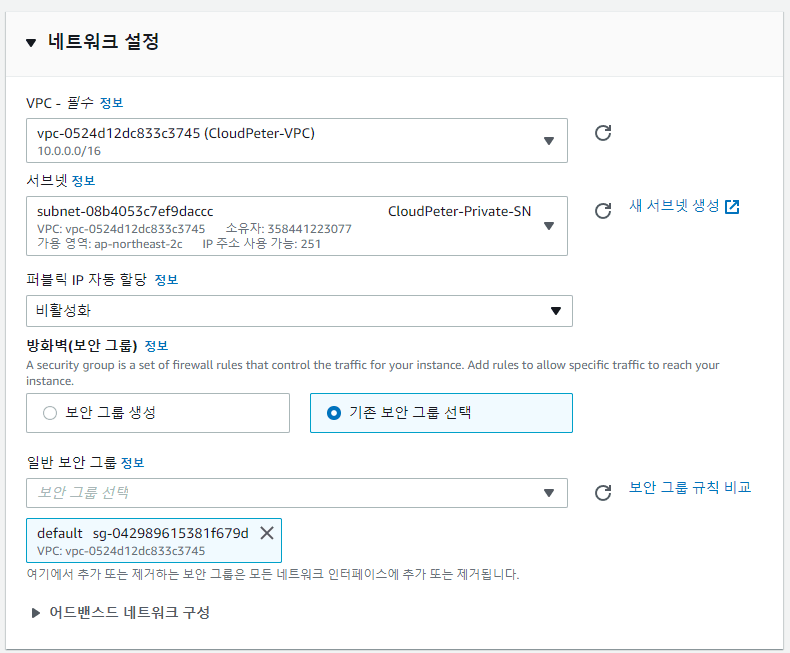
-
Advanced details
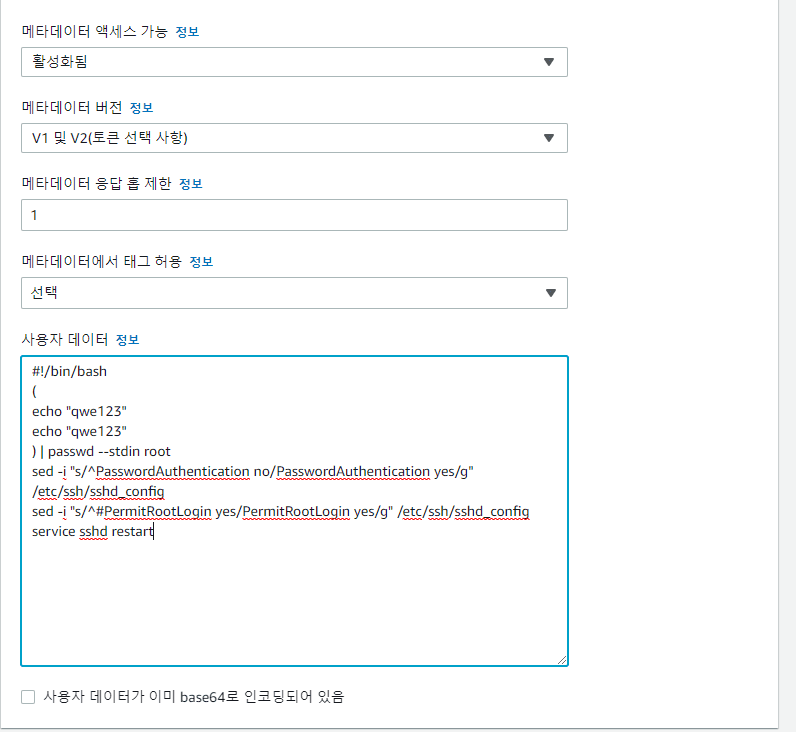
#!/bin/bash
(
echo "qwe123"
echo "qwe123"
) | passwd --stdin root
sed -i "s/^PasswordAuthentication no/PasswordAuthentication yes/g" /etc/ssh/sshd_config
sed -i "s/^#PermitRootLogin yes/PermitRootLogin yes/g" /etc/ssh/sshd_config
service sshd restart
The user data above is a configuration that allows SSH access via password. It is read and applied when the EC2 instance boots.
- Verify creation

If you check the network of Private-EC2, you can see that no public IP has been assigned.
Access EC2 Instance and Verify Communication
-
SSH into Public-EC2's IP
-
From the SSH session, SSH into Private-EC2's private IPv4 address
-
Verify that
ping google.comworks through NAT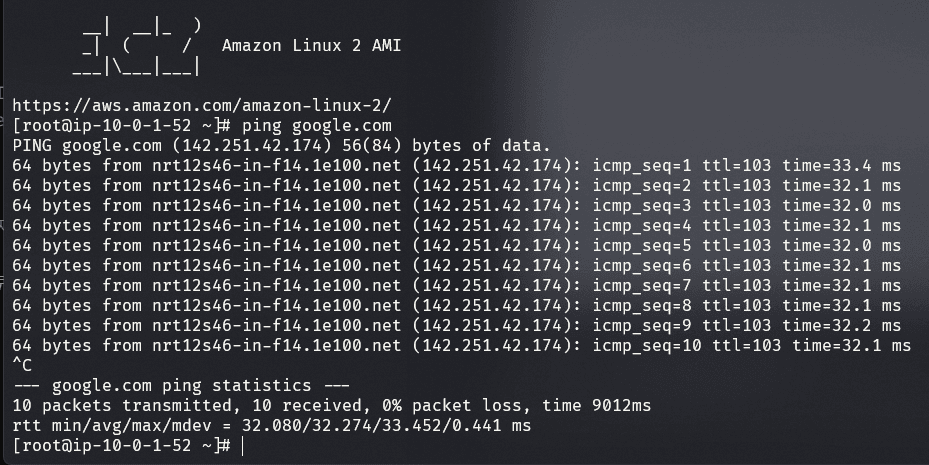
*With NAT, going from inside to outside is possible, but accessing the Private Subnet from outside is not possible
Delete Resources
- Terminate EC2 instances (EC2 -> Instances -> Select instance -> Actions -> Instance state -> Terminate)
- Delete NAT gateway (VPC -> NAT Gateways -> Actions -> Delete NAT gateway) Warning: Wait until the NAT gateway is deleted
- Delete Elastic IP (VPC -> Elastic IPs -> Actions -> Release Elastic IP addresses)
- Delete VPC (VPC -> Your VPCs -> Actions -> Delete VPC)
Published:
Modified: